인프라/Swagger
Swagger
Ssemi-Column
2022. 7. 10. 22:11
728x90
❓Swagger 란?
Swagger는 개발자가 REST API 서비스를 설계, 빌드, 문서화 할 수 있도록 하는 프로젝트이다.
🛠Swagger 가 유용한 경우
- 다른 개발 팀과 협업을 진행할 때
- 이미 구축되어있는 프로젝트에 대한 유지 보수를 진행할 때
- Back-end API를 호출하는 Front-end 프로그램을 제작할 경우
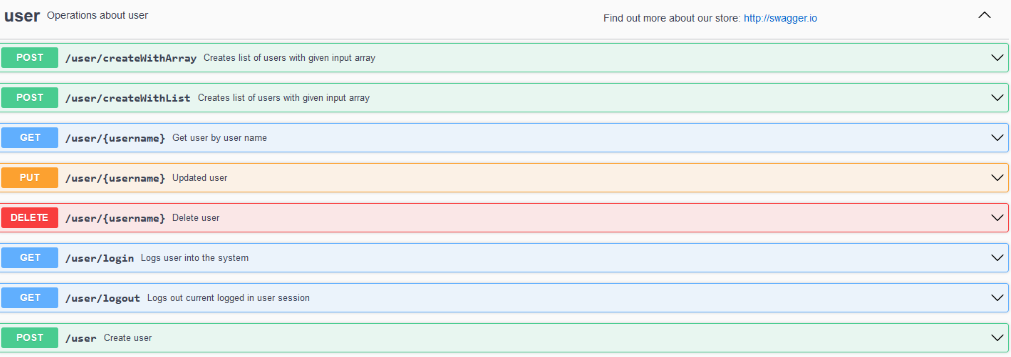
🖼Swagger 화면
- 메인 화면
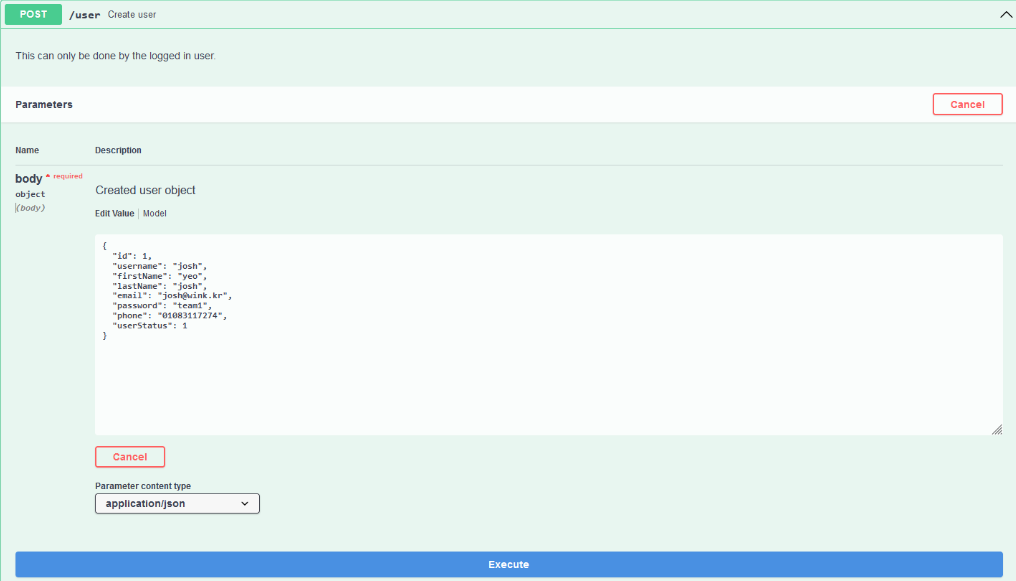
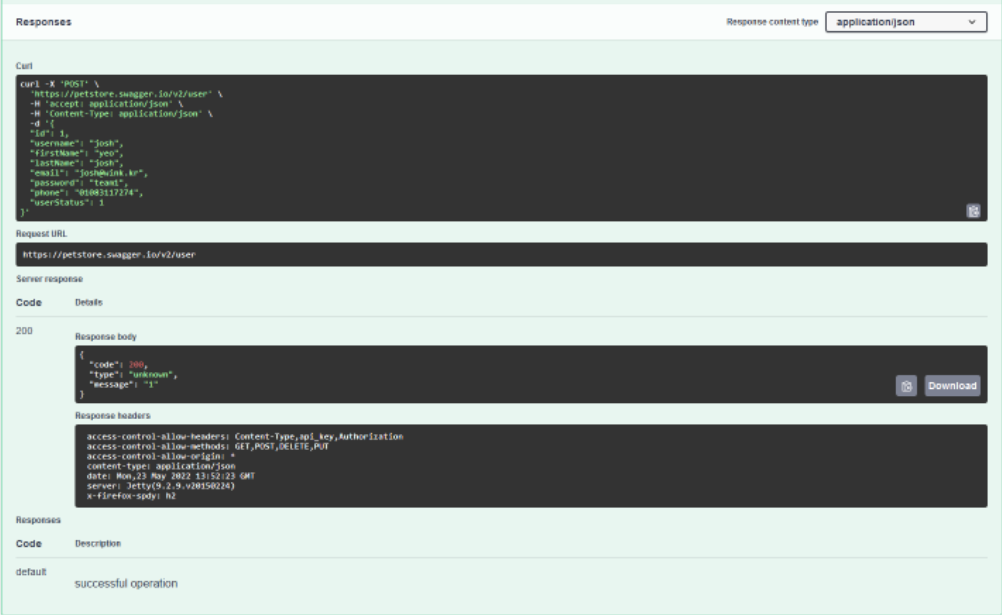
- 상세 화면
@Swagger Annotation
(참조 : https://velog.io/@gillog/Swagger-UI-Annotation-%EC%84%A4%EB%AA%85 )
- @ApiOperation = 해당 Controller 안의 method의 설명을 추가할 수 있다.
@ApiOperation( value = "사용자 정보 조회", notes = "사용자의 ID를 통해 사용자의 정보를 조회한다.")
@GetMapping("/user/{id}")
@ResponseBody
public UserDTO get(@PathVariable(name = "id") String id) {
	return userService.findUserInfoById(id);
}
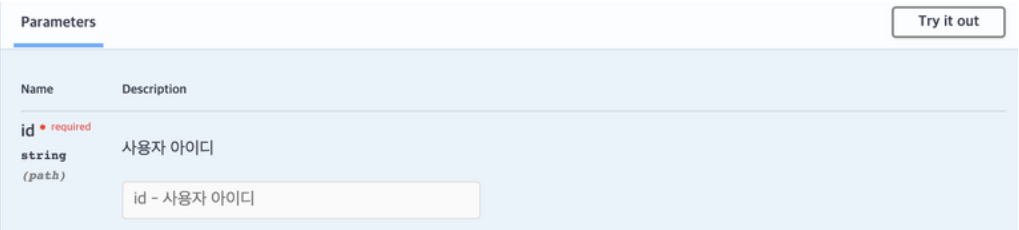
- @ApiImplicitParam = Request Parameter 설명, 복수의 경우 @ApiImplicitParams 안에서 정의한다.
    @ApiImplicitParam(
        name = "id"
        , value = "사용자 아이디"
        , required = true
        , dataType = "string"
        , paramType = "path"
        , defaultValue = "None")
    @GetMapping("/user/{id}")
    @ResponseBody
    public UserDTO getUser(@PathVariable(name = "id") String id) {
        return userService.findUserInfoById(id);
    }
   //-----------------------------------
    @ApiImplicitParams(
        {
            @ApiImplicitParam(
                name = "id"
                , value = "자격증 아이디"
                , required = true
                , dataType = "string"
                , paramType = "path"
                , defaultValue = "None"
            ),
            @ApiImplicitParam(
                name = "fields"
                , value = "응답 필드 종류"
                , required = false
                , dataType = "string"
                , paramType = "query"
                , defaultValue = ""
            )
        })
    @GetMapping("/licenses/{id}")
    @ResponseBody
    public UserDTO getLicense(@PathVariable(name = "id") String id, @RequestParam(name = "fields", required = false) String fields) {
        return userService.findUserInfoById(id);
    }
- @ApiResponse = Response 설명, 여러 개의 Response에 대한 설명을 추가 하고 싶다면, @ApiResponses를 사용한다.
@ApiResponse(
        code = 200
        , message = "성공입니다."
    )
    @GetMapping("/notices/{id}")
    public String getNotice() {
        return "notice";
    }
//---------------------------------------------
@ApiResponses({
        @ApiResponse(code = 200, message = "성공입니다.")
        , @ApiResponse(code = 400, message = "접근이 올바르지 않습니다.")
    })
    @GetMapping("/notices/{id}")
    public String getNotice() {
        return "notice";
    }
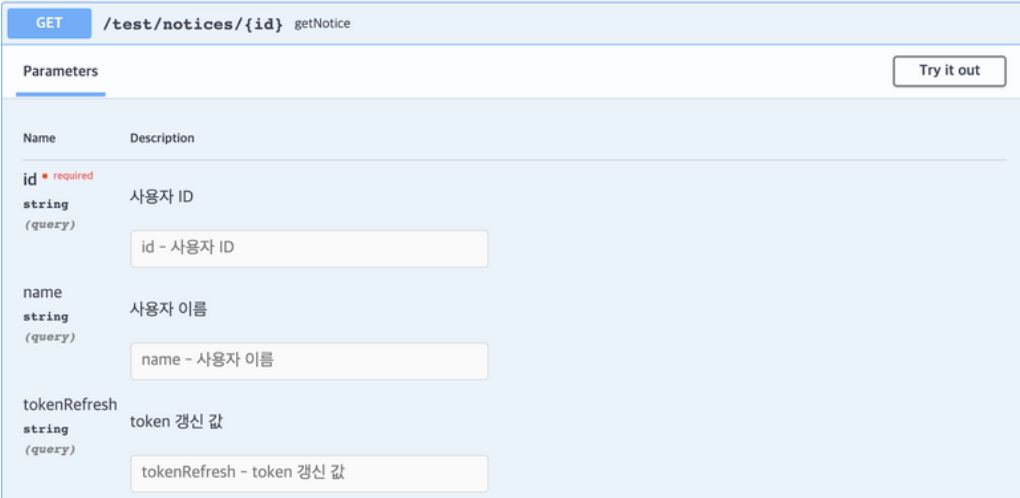
- @ApiParam = DTO field 설명
public class UserDTO {
    @ApiModelProperty(
        name = "id"
        , example = "gillog"
    )
    @ApiParam(value = "사용자 ID", required = true)
    private String id;

    @ApiParam(value = "사용자 이름")
    private String name;

    @ApiParam(value = "token 갱신 값")
    private String tokenRefresh;
}
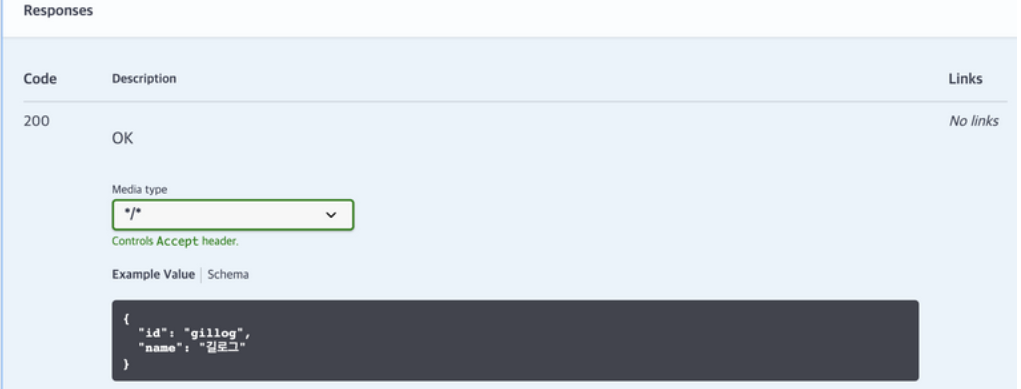
- @ApiModelProperty = DTO 예제에 대해 설명
public class UserDTO {

    @ApiParam(value = "사용자 ID", required = true)
    private String id;

    @ApiModelProperty(example = "길로그")
    @ApiParam(value = "사용자 이름")
    private String name;
}
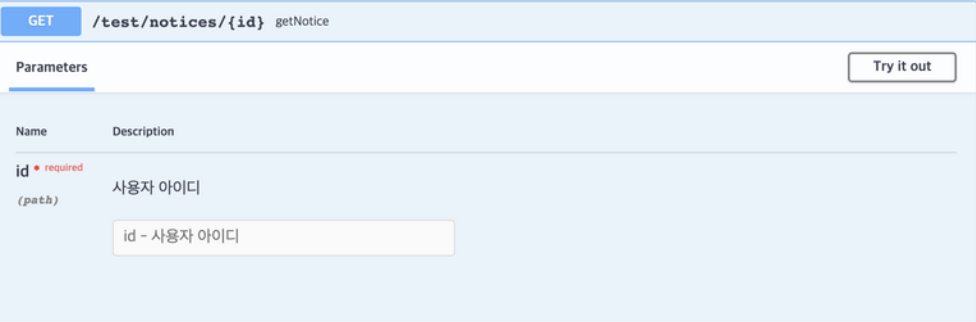
- @ApiIgnore = Swagger UI 상 선언하지 않은 parameter 정보들을 무시할 수 있다.
public class UserDTO {

    @ApiParam(value = "사용자 ID", required = true)
    private String id;

    @ApiModelProperty(example = "길로그")
    @ApiParam(value = "사용자 이름")
    private String name;
}
//ㅡㅡㅡㅡㅡㅡㅡㅡㅡㅡㅡㅡㅡㅡㅡㅡㅡㅡㅡㅡ
@ApiImplicitParam(
        name = "id"
        , value = "사용자 아이디"
        , required = true
        , dataType = "string"
        , paramType = "path"
        , defaultValue = "None")
    @GetMapping("/notices/{id}")
    public String getNotice(@ApiIgnore UserDTO userDTO) {
        return "notice";
    }
@ApiImplicitParam(
        name = "id"
        , value = "사용자 아이디"
        , required = true
        , dataType = "string"
        , paramType = "path"
        , defaultValue = "None")
    @GetMapping("/notices/{id}")
    public @ApiIgnore String getNotice(UserDTO userDTO) {
        return "notice";
    }
method의 return type 앞에 명시해 해당 method를 아예 Swagger UI 에서 노출되지 않게 바꿀 수도 있다.
Swagger 기본 사용해보기
(참조 : https://devlog-wjdrbs96.tistory.com/322 )
1. gradle 등록
compile group: 'io.springfox', name: 'springfox-swagger2', version: '2.5.0'
compile group: 'io.springfox', name: 'springfox-swagger-ui', version: '2.5.0'
2. swagger config 문서 작성
@Configuration
@EnableSwagger2
public class SwaggerConfiguration {

    @Bean
    public Docket swaggerApi() {
        return new Docket(DocumentationType.SWAGGER_2)
                .select()
                .apis(RequestHandlerSelectors.any())
									// 현재 RequestMapping으로 할당된 모든 URL 리스트 추출
                .paths(PathSelectors.any())
	// PathSelectorys.any("/api/**")) 와 같이 /api/** 인 URL로만 필터링 할 수 있습니다.
                .build();
    }
}
3. controller, dto 작성
@RestController
public class SwaggerController {

    @GetMapping("/")
    public String get() {
        return "get";
    }

    @PutMapping("/")
    public String put(@RequestBody SwaggerDto swaggerDto) {
        return swaggerDto.getId();
    }

    @PostMapping("/")
    public String post(@RequestBody SwaggerDto swaggerDto) {
        return swaggerDto.getName();
    }

    @DeleteMapping("/{id}")
    public String delete(@PathVariable(name = "id") String id) {
        return id;
    }
}

//-----

@Getter
@Setter
public class SwaggerDto {

    private String id;

    private String name;

}
4. Application run 후 web 접속 (ex http://localhost:8080/swagger-ui/index.html)

728x90
반응형
LIST